
There are some things that seem impossible and this recipe is one of them. How on earth could you possibly make meringues without egg?! Well, some genius discovered that by whisking the murky water from a can of chickpeas you end up with an impossibly good, vegan egg substitute.
Ingredients
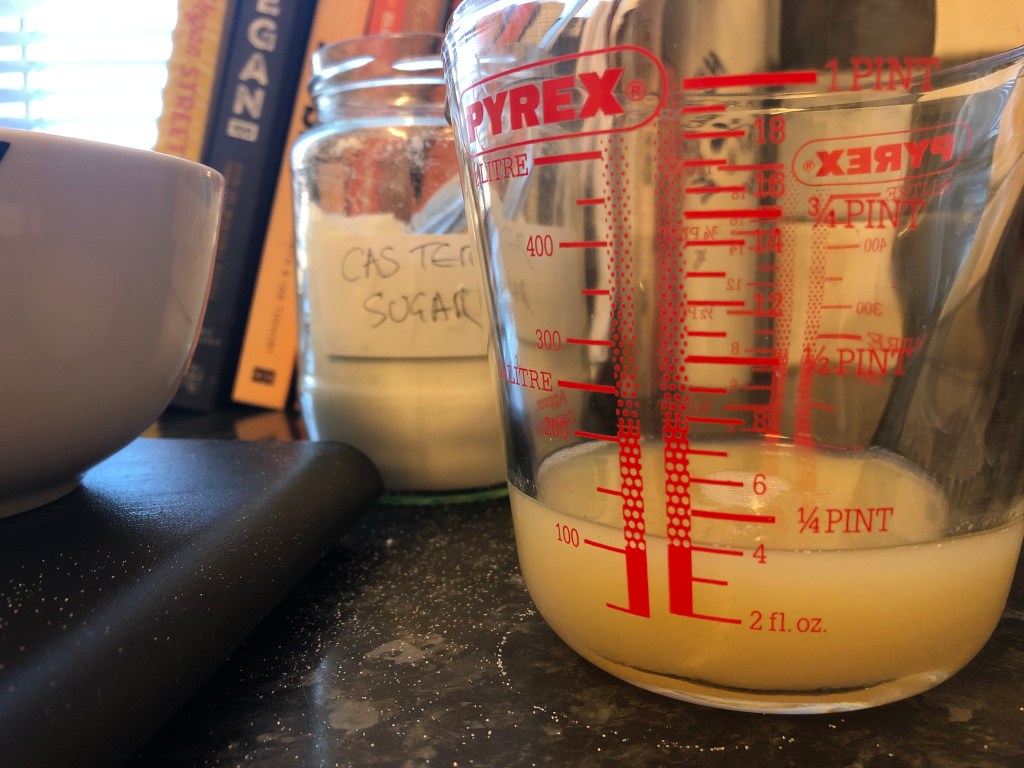
This recipe only requires three ingredients, chickpea brine (aquafaba), caster sugar and some patience.
Rather than give you exact measurements and worry about wasting any chickpea related goodness, here is how I measure. (I tend to have a jar of aquafaba in the fridge at any given moment so…) Pour your aquafaba into a measuring jug, now you’re going to need the same amount of sugar plus about 20% in grams. Sometimes in baking you need to be super accurate with your measurements, this isn’t one of those times. Today I started with 100ml of aquafaba, so I measured out 100g of caster sugar and added a couple more generous spoons (which worked out to roughly 120g). It really is that simple.
Now if you’re a dab hand at this I am going to leave you to it, preheat your oven to 100°c, line a couple of baking trays with greaseproof paper. Whisk up your aquafaba, add sugar, bake for about an hour and ten minutes then turn off the oven, pop the door open a little and leave to cool.
If it’s your first time on the aquafaba rodeo, have a quick scroll before you start to get some hints and tips to ensure instant, sweet success!
The third ingredient in the recipe was patience for a good reason, you really do need to keep on whisking. Unlike egg whites, you cannot over do it with aquafaba (I haven’t managed to yet!). The other thing that you need is a very clean bowl, oil is the enemy here. If you do have a glass bowl use that, I don’t so I just make sure it’s had a good slosh with some boiling water to lift any oil residue away before I start.
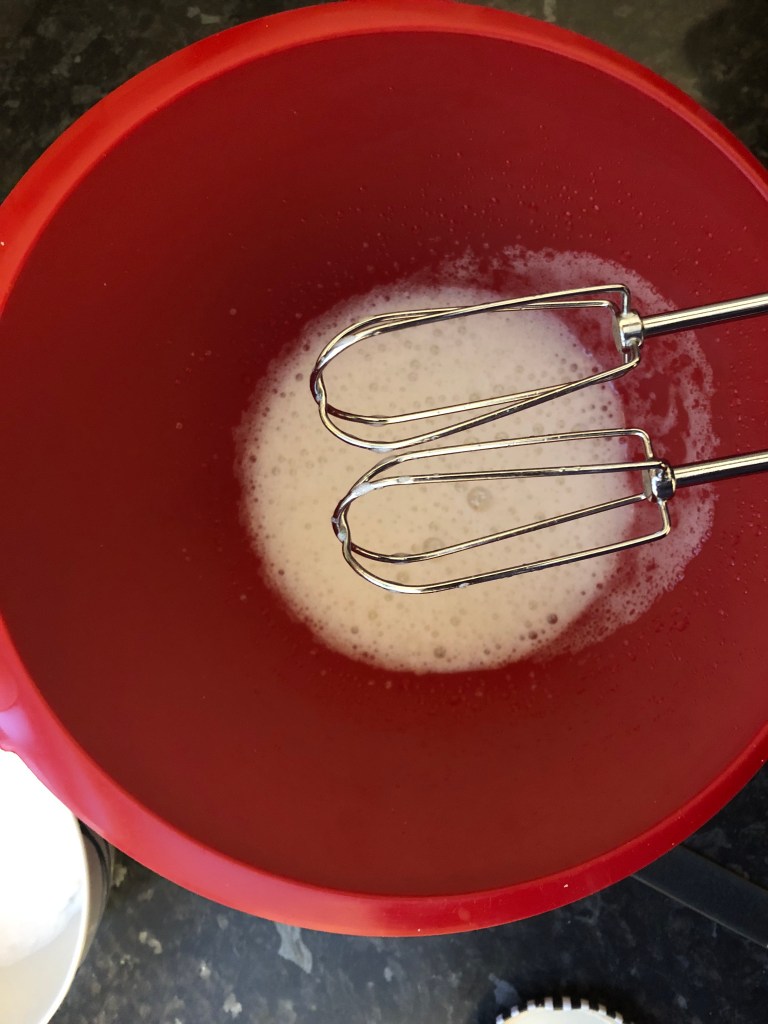
Keep whisking, it seems like it isn’t going to do anything to start off with except go white and frothy on top. Trust me, the magic is about to happen. Stick on your favourite tunes and dance around. Depending on your whisk and how much aquafaba you are using, you should be expecting to whisk for five minutes, minimum!
Don’t stop yet, remember you can’t over do it with aquafaba. When you think you’re done, keep on whisking until the end of the next song. You won’t regret the extra couple of minutes you’ve spent and your oven needs to heat up anyway!
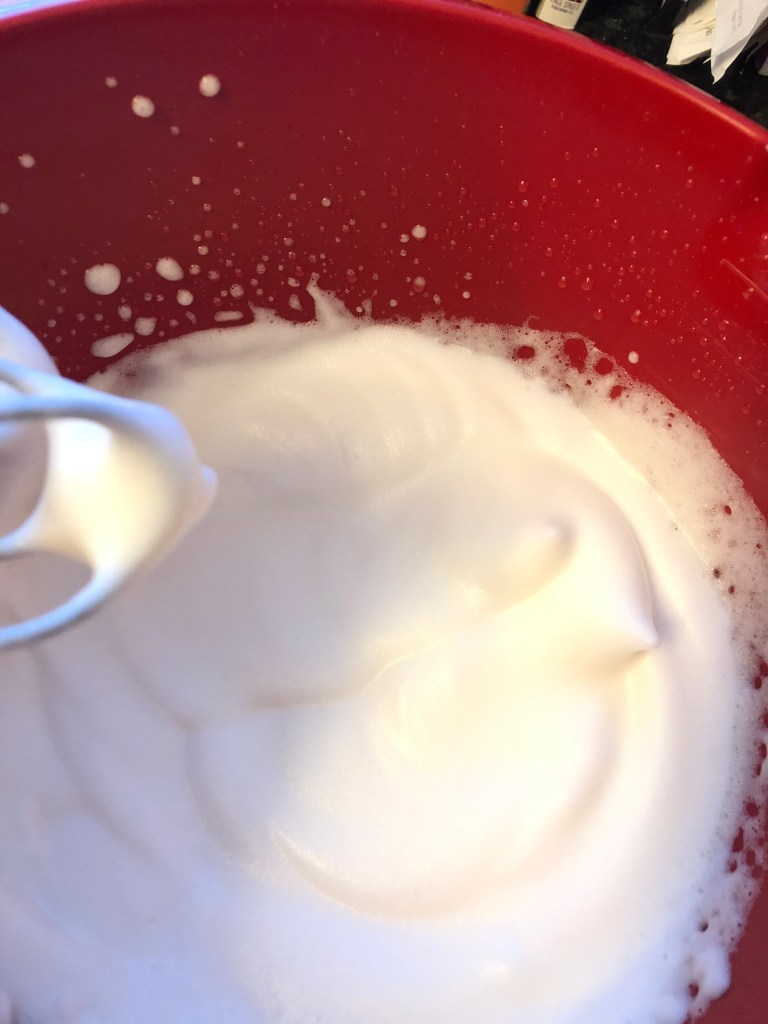
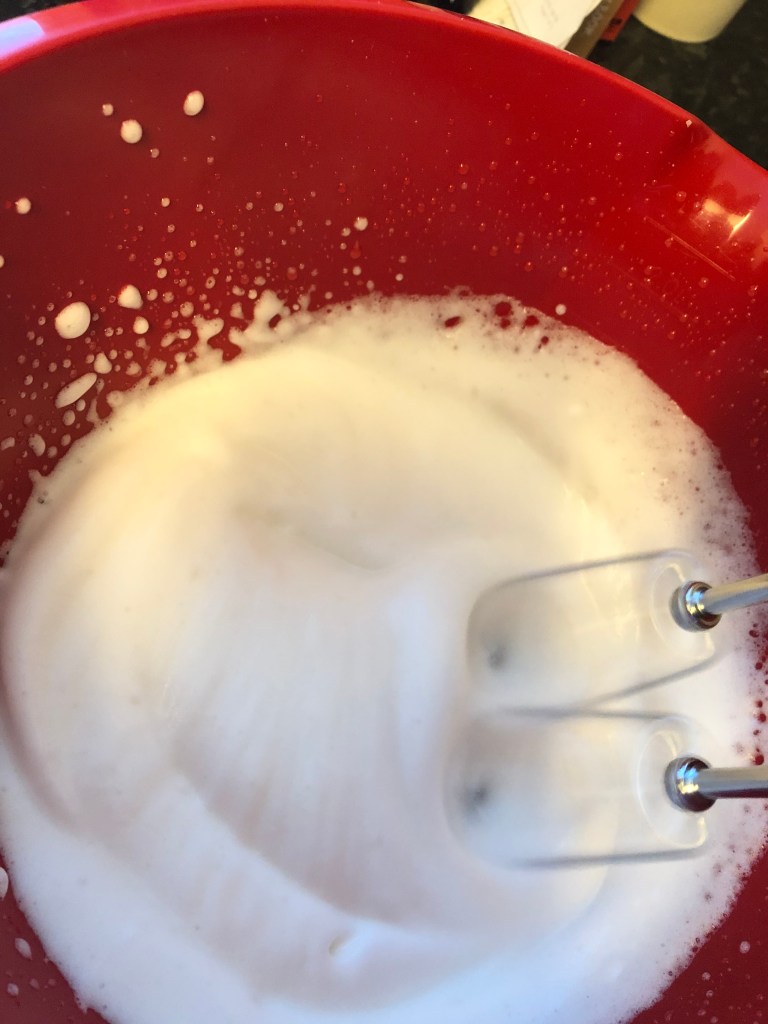
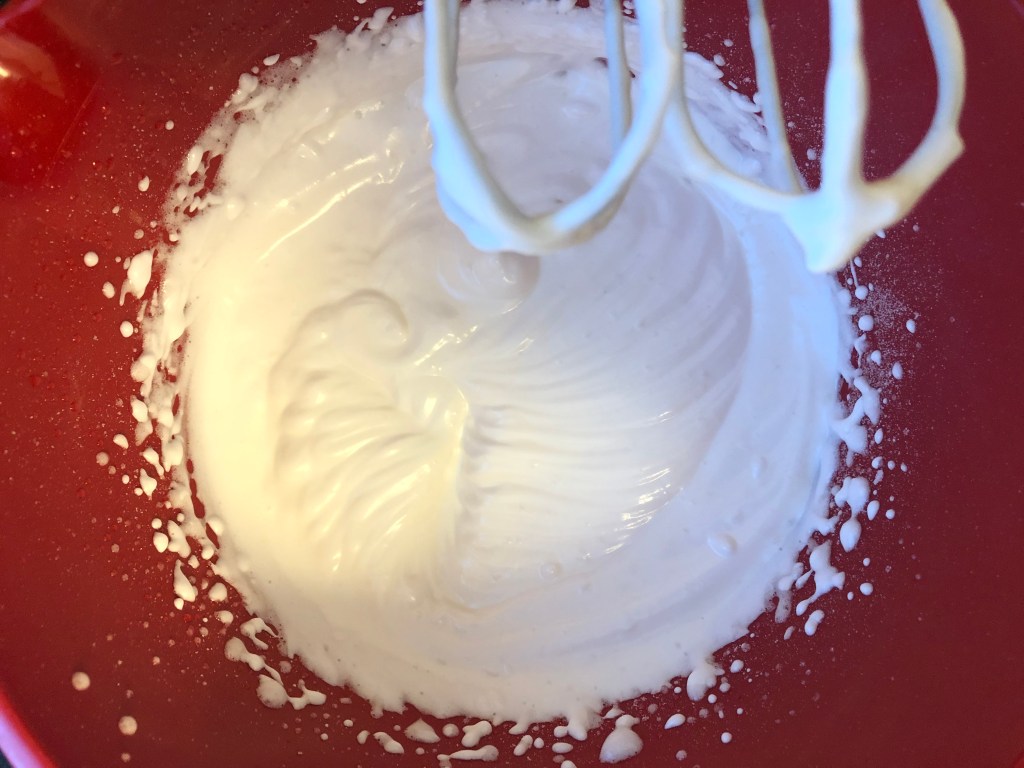
Just like with egg whites, you’re looking for a glossy mixture that holds its shape. You can always have some fun, holding the bowl over the nearest human’s head to see if your aquafaba is ready!
Next you need to add the sugar, add it slowly, one spoon at a time and keep on whisking vigorously. You should end up with a glossier version of your stiff peaks!
Spoon your mixture onto your trays, leave some space between them as they will expand in the oven. If you’re feeling particularly fancy you could pipe the meringues onto the tray. For pro-level meringue, try dripping some food colouring down the side of your piping bag for a colour pop.
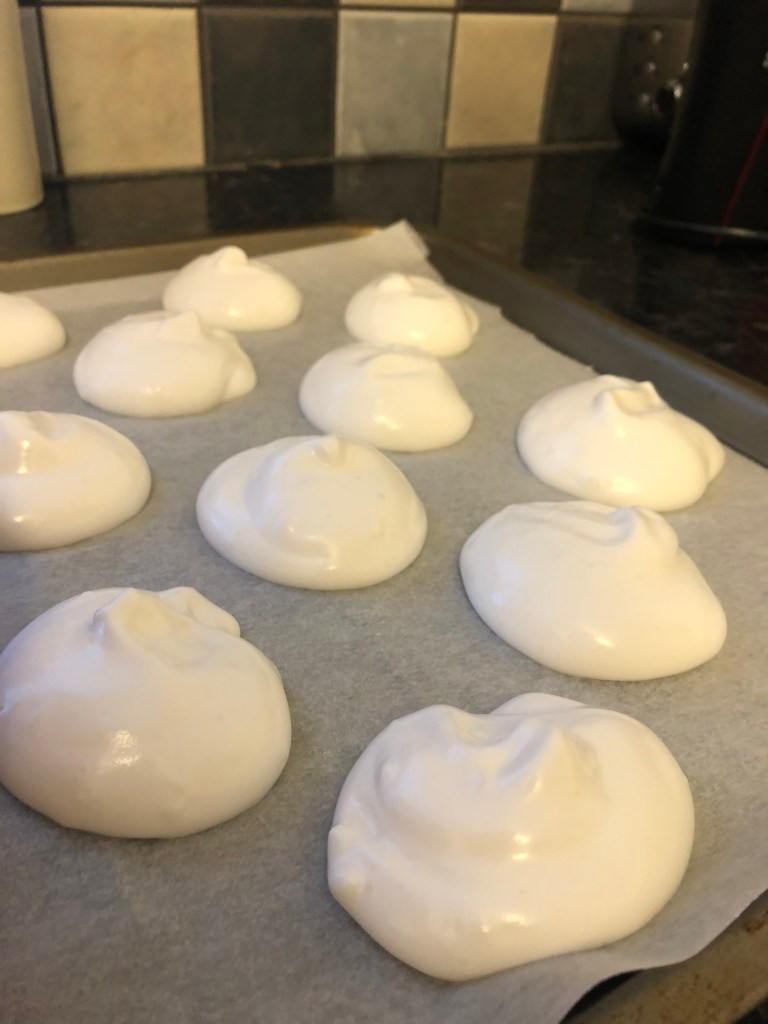
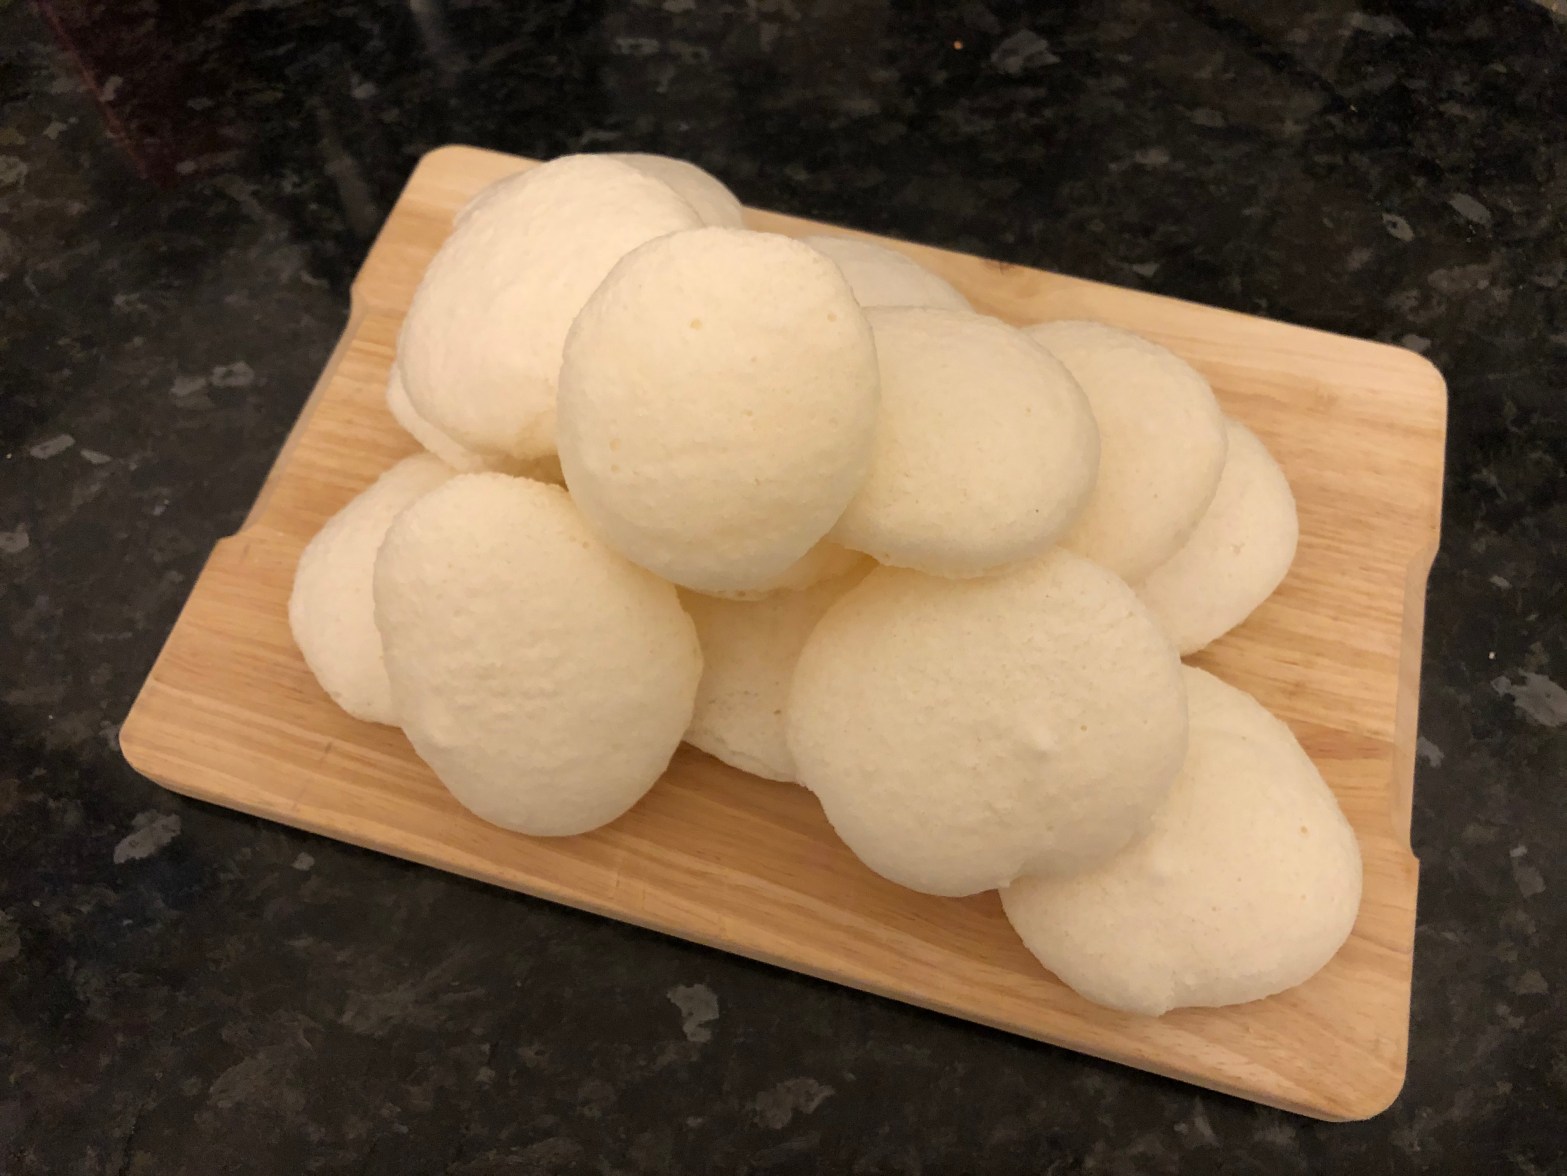
Carefully slide your trays into the oven and set a timer for an hour and ten minutes. Depending on the size of your meringues, you may need to alter your timings. (I made sixteen meringues, each one was a good, dessert spoon sized dollop onto the tray.)
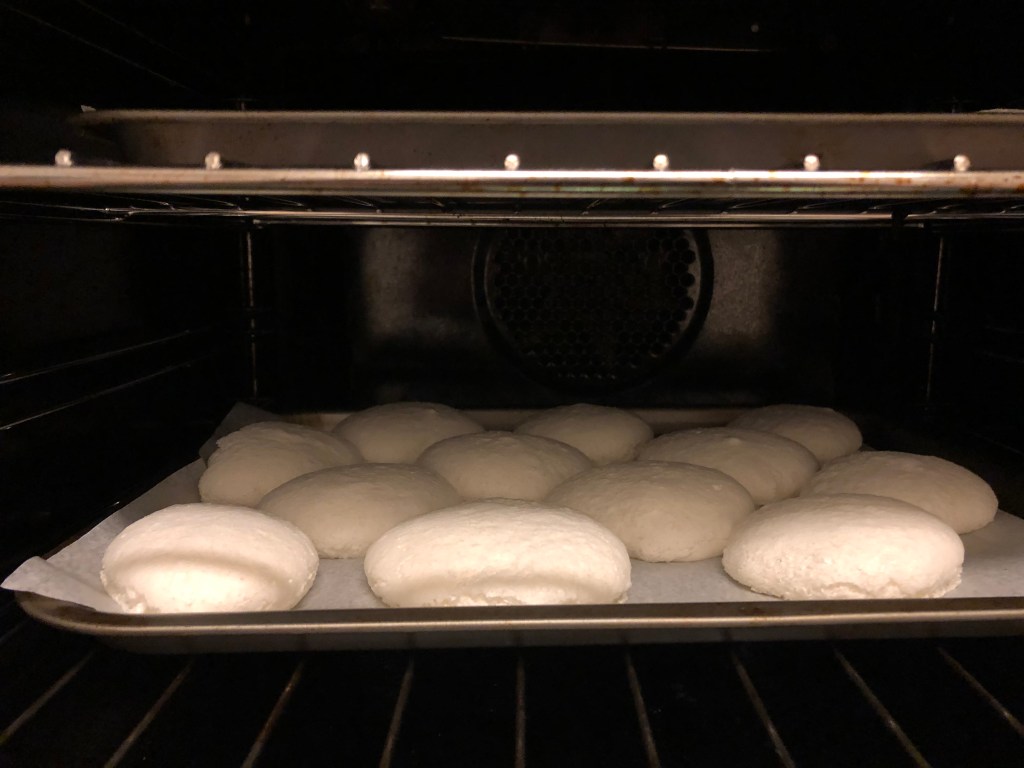
When your timer goes off, run to the oven! Switch it off, open the door a little and let the hot air out. Once the oven has cooled down significantly you can close the oven door again. Don’t take them out of the oven for a couple more hours if you can help it. You want to make sure they have enough time to carry on drying out.

Once they have cooled down, carefully remove them from the tray and store them in an airtight container. They are great on their own but if you want an easy, DIY dessert idea, keep scrolling.
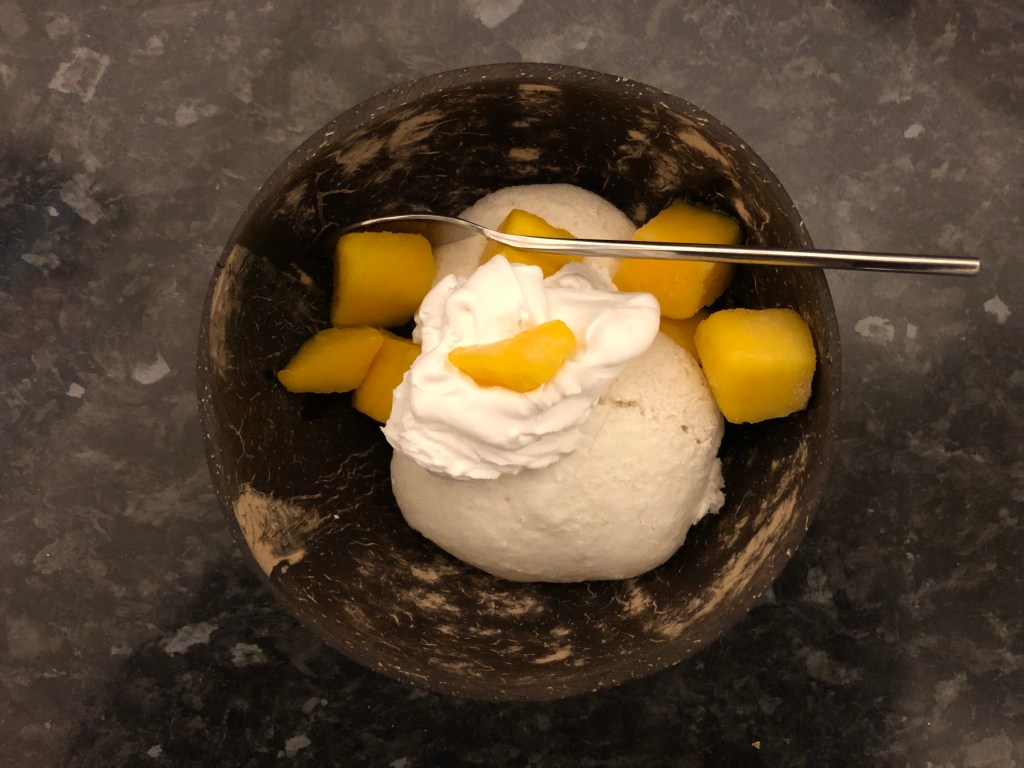
You could assemble this as individual portions or take all the parts out to the table and let your guests serve themselves. Open a can of coconut milk (don’t shake it, take it out of the fridge for bonus points) and scoop out the coconut cream. You’ll need your whisk again, whip it up into a light, fluffy cream. Then take some fruit, strawberries, blueberries, mango, melon slices, grapes, pomegranate seeds… whatever, go mad. Stick it all in bowls on the table and watch the battle for that last chunk of mango unfold before your very eyes.
I hope you found these tips and tricks useful, aquafaba meringues are all the rage at the moment. If you do try any of these recipes out, make sure you snap a quick pic before it all disappears and tag me on Instagram @snackalinaeats so that I can see your wicked and wild creations.
Snackalina out. x
